
Copyright 2009-2024. All Rights Reserved.
NOTE: This article was first published in Autoharp Quarterly, Vol. 16, No. 3, Spring 2004. Unfortunately, the figures with that article were badly botched, and make no sense as published. They should be correct here. Some updates to the original text were added [in brackets] in 2009.
by Doug Pratt
This article describes a system of my own design for enhancing the sound of the autoharp. Many years ago I realized that autoharps always sounded richer, fuller, and louder when played on a tabletop (as they were originally intended to be). So it occurred to me that one reason was that the back of the instrument was not deadened against one's body. Of course, the tabletop also serves as a sounding board like that of a piano. Now, all of my autoharps are equipped with a "false back" that leaves an open space between the back of the instrument and one's body when playing upright. Actually, according to the Autoharp Owner's Manual, others have come up with similar devices, so I can't claim that this is anything unique, but I did think of it independently and made my first one about 1965. "Pop" Stoneman, who played lap style, had the same idea when he placed his autoharp on an empty case for playing. The case provided an extra soundbox. I considered patenting my idea, but decided there was no money in it, so I am sharing it for free. Incidentally, some have suggested that my device is only a spacer and not a resonator in the usual sense of the term, but I (and others who have tried it) disagree. If you just hold the instrument away from your body without the false back attached, it still will not project its sound as well as it will with the device. So I will continue to call it a “resonator back,” and you can call it what you like.
Purpose. If you like your autoharp quiet or always play by yourself, you won't see much value in the resonator back, but if you play in an ensemble, or often join jams with other instruments, especially bluegrass and old time music, you will appreciate the enhancement. For me, it brightens the tone as well as increasing the volume. Finally you can "cut through" with a lead without having to ask everyone else to "lay back." (If you try to do this with an amp, you will be treated like a skunk at a picnic in most acoustic jams.) I play an old, inexpensive model ChromAharp with this homemade resonator, and it is louder and brighter than any autoharp I have compared it with so far, including many luthier 'harps. People often remark how good it sounds “for a ChromAharp” but I think part of that is just prejudice against this low-priced line of instruments. One just naturally expects poor sound from a cheaper instrument, but fortunately that is not always the case. I suspect the great-sounding Orthey, Fladmark, d'Aigle, and other handcrafted 'harps would sound even better (and certainly louder, if you want that) with a resonator back attached.
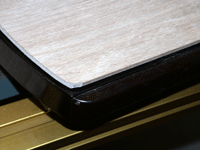
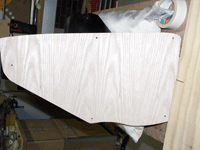
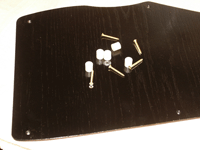
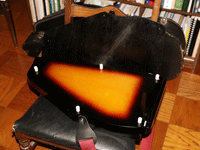
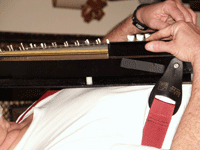
Materials and assembly. To make a resonator back, cut out a piece of any sort of stiff, thin sheet substance (such as plywood, vinyl, masonite, etc., whatever looks good or is available to you) in the shape of your autoharp. It need not cover the entire back, and must not interfere with any movable parts such as the plastic cover over the end pins of a ChromAharp, which needs room to flip open; Fig. 1). Then drill small holes through this piece and into the outer perimeter (about an inch from the edge) of the autoharp in 5 places, one at the thin end, two in the middle and two at the bottom (Fig. 2). If you have a luthier 'harp, better consult your craftsman about where to drill or have him/her do it. (Also, your luthier might be able to match the original wood on the back of the autoharp.) [2009 NOTE: An alternative to drilling into a beautiful luthier back is to glue the spacers to the resonator back and attach the assembly to the autoharp with double-stick removable pads. The pads will not hold forever, but are easily replaced, and allow you to remove the resonator to see the original back.] You will need 5 spacers to set between the main body of the autoharp and the false back. For the figures accompanying this article, I used plastic spacers from a hardware store (these are just plastic disks or cylinders that look like a doughnut in cross-section; hardware store people should know what spacers are). Spacers come in several thicknesses, and the choice depends on how much space you want to leave between the instrument and the resonator back. You may need to use more than one spacer at each point. I recommend at least a half inch. Someone in one of my workshops recently suggested that wooden beads from a craft store would make good, and more attractive, spacers. They are probably right, and I plan to check it out soon but for now I am using the plastic ones. [2009 NOTE: I now use small wooden spools available from craft stores.] A luthier could easily make spacers of matching wood. You will also need 5 wood screws long enough to go through the new back and spacers and anchor in the autoharp (Figs. 3-4). Then, just put it all together. If you have the equipment, it is also nice to countersink the screw holes so that the back is perfectly smooth against your body, and if you use wood you will probably want to finish the resonator back in some way that looks good with your instrument, but functionality does not depend much on appearance or materials. The assembly leaves a space between the resonator back and the actual back of the instrument, the depth of which depends on the thickness of your spacers (Fig. 5).
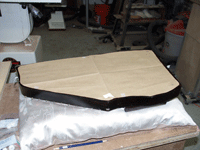
Using the original “feet.” If you have one of the older OS or ChromAharp models that come with "feet" for setting them on a tabletop, you can use the feet as spacers (even rubber ones will work; you are not transferring vibrations to the resonator back, but using it as a reflector). You simply drill holes in the resonator back at the exact locations of the feet (take the feet off and make a paper template, then punch through the paper with an ice pick at the screw holes; Fig. 6). Then you can mark the locations for drilling the 3 holes in your false back. You will have to replace the screws in the feet with longer ones that will accommodate the additional thickness and still reach the original screw holes. This avoids drilling any additional holes in the back of the autoharp. However, depending on how sturdy your resonator back material is, you might still need to add mid-body supports and use the spacers described above to prevent buckling.
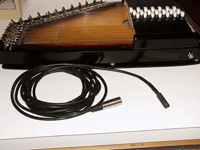
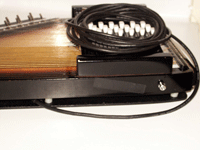
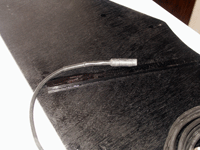
Use with a pickup or microphone. The resonator back has the added advantage of providing the perfect space for a small microphone or piezoelectric pickup. In fact, some may find this to be its most useful aspect. For many years I used a Barcus-Berry transducer (a model no longer made) attached to the back of the autoharp (you will have to experiment with positioning this type of pickup; where you put it makes a lot of diffference), but now I prefer a microphone because I get a more natural sound (the audience hears essentially what you hear when you place your ear against the side of the autoharp). The problem with vocal mikes and autoharps is that you need to get really close to most of them to get good amplification without feedback (watch singers on TV; they practically swallow the mike). But for autoharp, the mike needs to be exactly where your picking hand is, which it just can't be, so it's too far away and when you try to turn up the gain, it just feeds back and you end up frustrated. (This is not the case with very expensive mikes such as those used at the big festivals, but most people have the cheaper ones.) A small mike tucked into the back space solves this problem beautifully, you can still claim to be playing acoustically (it's a microphone, not a pickup, after all), and, except for the trailing chord, there is no visible indication that the instrument is anything other than acoustic. You will need one that is thin enough to slip into the space between the resonator back and the instrument back (and this may influence how much space you create). Mine is a bit thicker than a pencil and came from Radio Shack. I had a craftsman make a pre-amp for it, so it is not something you could buy over the counter. However, some of the better small lapel mikes that are available as a package should work quite well. My mike is not actually attached to the autoharp, because I use it on other instruments as well, and I just insert it into the inner (long, straight) edge of the autoharp between the back and resonator letting the cord rest on top of the middle spacer (Figs. 7-8). However, the cord is not stiff enough to hold it in position and the mike sags out of position without something to keep it in place. So I glue a strip of wood across the inner side of the resonator back (Fig. 9) thick enough to prevent the mike from sliding past it but not thick enough to touch the instrument back (which would, obviously, defeat the whole purpose). It is something like a small shelf that the mike just rests against and I can adjust how far in the mike sits. As with piezoelectric pickups, positioning makes a big difference, so experiment before settling on one spot. Once in place, I temporarily secure the mike chord with a strip of tape (duct tape is ugly but works best). Depending on the kind of mike you use, there are many other ways to place the microphone, including permanently mounting it inside the resonator back or holding it in place with a clip on the thin edge of the false back. The result is a very comfortable and unobtrusive pickup for performances (Fig. 10).
Thanks to Doreen Sorrels for the photo in Figure 10, taken at the 2004 Jubilee Pickers Festival in Gulf Shores, Alabama, April 3.
A RESONATOR BACK FOR AUTOHARPS
by Doug Pratt
This article describes a system of my own design for enhancing the sound of the autoharp. Many years ago I realized that autoharps always sounded richer, fuller, and louder when played on a tabletop (as they were originally intended to be). So it occurred to me that one reason was that the back of the instrument was not deadened against one's body. Of course, the tabletop also serves as a sounding board like that of a piano. Now, all of my autoharps are equipped with a "false back" that leaves an open space between the back of the instrument and one's body when playing upright. Actually, according to the Autoharp Owner's Manual, others have come up with similar devices, so I can't claim that this is anything unique, but I did think of it independently and made my first one about 1965. "Pop" Stoneman, who played lap style, had the same idea when he placed his autoharp on an empty case for playing. The case provided an extra soundbox. I considered patenting my idea, but decided there was no money in it, so I am sharing it for free. Incidentally, some have suggested that my device is only a spacer and not a resonator in the usual sense of the term, but I (and others who have tried it) disagree. If you just hold the instrument away from your body without the false back attached, it still will not project its sound as well as it will with the device. So I will continue to call it a “resonator back,” and you can call it what you like.
Purpose. If you like your autoharp quiet or always play by yourself, you won't see much value in the resonator back, but if you play in an ensemble, or often join jams with other instruments, especially bluegrass and old time music, you will appreciate the enhancement. For me, it brightens the tone as well as increasing the volume. Finally you can "cut through" with a lead without having to ask everyone else to "lay back." (If you try to do this with an amp, you will be treated like a skunk at a picnic in most acoustic jams.) I play an old, inexpensive model ChromAharp with this homemade resonator, and it is louder and brighter than any autoharp I have compared it with so far, including many luthier 'harps. People often remark how good it sounds “for a ChromAharp” but I think part of that is just prejudice against this low-priced line of instruments. One just naturally expects poor sound from a cheaper instrument, but fortunately that is not always the case. I suspect the great-sounding Orthey, Fladmark, d'Aigle, and other handcrafted 'harps would sound even better (and certainly louder, if you want that) with a resonator back attached.
Materials and assembly. To make a resonator back, cut out a piece of any sort of stiff, thin sheet substance (such as plywood, vinyl, masonite, etc., whatever looks good or is available to you) in the shape of your autoharp. It need not cover the entire back, and must not interfere with any movable parts such as the plastic cover over the end pins of a ChromAharp, which needs room to flip open; Fig. 1). Then drill small holes through this piece and into the outer perimeter (about an inch from the edge) of the autoharp in 5 places, one at the thin end, two in the middle and two at the bottom (Fig. 2). If you have a luthier 'harp, better consult your craftsman about where to drill or have him/her do it. (Also, your luthier might be able to match the original wood on the back of the autoharp.) [2009 NOTE: An alternative to drilling into a beautiful luthier back is to glue the spacers to the resonator back and attach the assembly to the autoharp with double-stick removable pads. The pads will not hold forever, but are easily replaced, and allow you to remove the resonator to see the original back.] You will need 5 spacers to set between the main body of the autoharp and the false back. For the figures accompanying this article, I used plastic spacers from a hardware store (these are just plastic disks or cylinders that look like a doughnut in cross-section; hardware store people should know what spacers are). Spacers come in several thicknesses, and the choice depends on how much space you want to leave between the instrument and the resonator back. You may need to use more than one spacer at each point. I recommend at least a half inch. Someone in one of my workshops recently suggested that wooden beads from a craft store would make good, and more attractive, spacers. They are probably right, and I plan to check it out soon but for now I am using the plastic ones. [2009 NOTE: I now use small wooden spools available from craft stores.] A luthier could easily make spacers of matching wood. You will also need 5 wood screws long enough to go through the new back and spacers and anchor in the autoharp (Figs. 3-4). Then, just put it all together. If you have the equipment, it is also nice to countersink the screw holes so that the back is perfectly smooth against your body, and if you use wood you will probably want to finish the resonator back in some way that looks good with your instrument, but functionality does not depend much on appearance or materials. The assembly leaves a space between the resonator back and the actual back of the instrument, the depth of which depends on the thickness of your spacers (Fig. 5).
Using the original “feet.” If you have one of the older OS or ChromAharp models that come with "feet" for setting them on a tabletop, you can use the feet as spacers (even rubber ones will work; you are not transferring vibrations to the resonator back, but using it as a reflector). You simply drill holes in the resonator back at the exact locations of the feet (take the feet off and make a paper template, then punch through the paper with an ice pick at the screw holes; Fig. 6). Then you can mark the locations for drilling the 3 holes in your false back. You will have to replace the screws in the feet with longer ones that will accommodate the additional thickness and still reach the original screw holes. This avoids drilling any additional holes in the back of the autoharp. However, depending on how sturdy your resonator back material is, you might still need to add mid-body supports and use the spacers described above to prevent buckling.
Use with a pickup or microphone. The resonator back has the added advantage of providing the perfect space for a small microphone or piezoelectric pickup. In fact, some may find this to be its most useful aspect. For many years I used a Barcus-Berry transducer (a model no longer made) attached to the back of the autoharp (you will have to experiment with positioning this type of pickup; where you put it makes a lot of diffference), but now I prefer a microphone because I get a more natural sound (the audience hears essentially what you hear when you place your ear against the side of the autoharp). The problem with vocal mikes and autoharps is that you need to get really close to most of them to get good amplification without feedback (watch singers on TV; they practically swallow the mike). But for autoharp, the mike needs to be exactly where your picking hand is, which it just can't be, so it's too far away and when you try to turn up the gain, it just feeds back and you end up frustrated. (This is not the case with very expensive mikes such as those used at the big festivals, but most people have the cheaper ones.) A small mike tucked into the back space solves this problem beautifully, you can still claim to be playing acoustically (it's a microphone, not a pickup, after all), and, except for the trailing chord, there is no visible indication that the instrument is anything other than acoustic. You will need one that is thin enough to slip into the space between the resonator back and the instrument back (and this may influence how much space you create). Mine is a bit thicker than a pencil and came from Radio Shack. I had a craftsman make a pre-amp for it, so it is not something you could buy over the counter. However, some of the better small lapel mikes that are available as a package should work quite well. My mike is not actually attached to the autoharp, because I use it on other instruments as well, and I just insert it into the inner (long, straight) edge of the autoharp between the back and resonator letting the cord rest on top of the middle spacer (Figs. 7-8). However, the cord is not stiff enough to hold it in position and the mike sags out of position without something to keep it in place. So I glue a strip of wood across the inner side of the resonator back (Fig. 9) thick enough to prevent the mike from sliding past it but not thick enough to touch the instrument back (which would, obviously, defeat the whole purpose). It is something like a small shelf that the mike just rests against and I can adjust how far in the mike sits. As with piezoelectric pickups, positioning makes a big difference, so experiment before settling on one spot. Once in place, I temporarily secure the mike chord with a strip of tape (duct tape is ugly but works best). Depending on the kind of mike you use, there are many other ways to place the microphone, including permanently mounting it inside the resonator back or holding it in place with a clip on the thin edge of the false back. The result is a very comfortable and unobtrusive pickup for performances (Fig. 10).
Thanks to Doreen Sorrels for the photo in Figure 10, taken at the 2004 Jubilee Pickers Festival in Gulf Shores, Alabama, April 3.
Figure 1
Figure 2
Figure 3
Figure 4
Figure 5
Figure 6
Figure 7
Figure 8
Figure 9
Figure 10
